You can make a difference in the Apple Support Community!

When you sign up with your Apple Account, you can provide valuable feedback to other community members by upvoting helpful replies and User Tips.

Looks like no one’s replied in a while. To start the conversation again, simply ask a new question.

Adjust a range of dates by a set amount

I have several documents in which I have payments or expenses -- or basically anything that tends to recur monthly. Whenever the a new month starts, I grab the current month's set of rows, paste them above, then manually adjust the dates one cell at a time. It's a pain.


So 5/2/2021 becomes 6/2/2021 and 5/4/2021 becomes 6/4/2021, etc.


Is there a quick way to grab a set of dates and, basically, tell them each to "add one month"?


MacBook Pro (2020 and later)

Posted on May 17, 2021 5:10 PM

Reply
Question marked as Top-ranking reply

Posted on May 17, 2021 6:36 PM

Click on any cell of the 'old' table to activate it, then click on the circle that appears in the intersection of the row and column reference tabs to select the whole table. Press command-C to copy that table and its data and formulas to the clipboard,


Move to the new sheet that is to contain the new table (This may be a separate sheet in the same document or in a different document,). Delete the existing table that came with his sheet, then click on the sheet and press command-V to paste the old table on this sheet.


Keep the dates and any data that will remain the same on the new table, and remove any that will not be the same for this round.


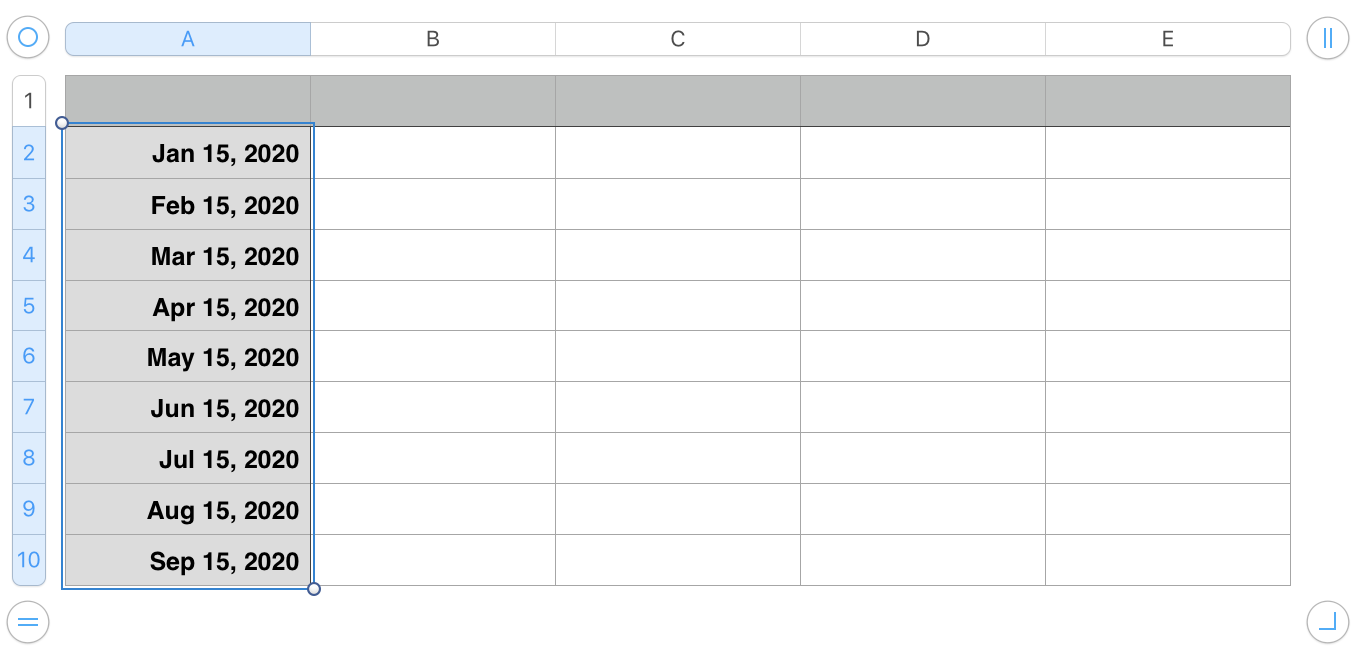
For a table with no repeat data, the result should resemble this:


Click on any cell in column A, then press option-left arrow to add a new column to the left of column A.


In the new column A, select cell A2 (one click), then type = to open the formula editor.


Enter or paste the formula below into the editor, then click the green checkmark to confirm the formula and close the editor.


EDATE(B2,12)
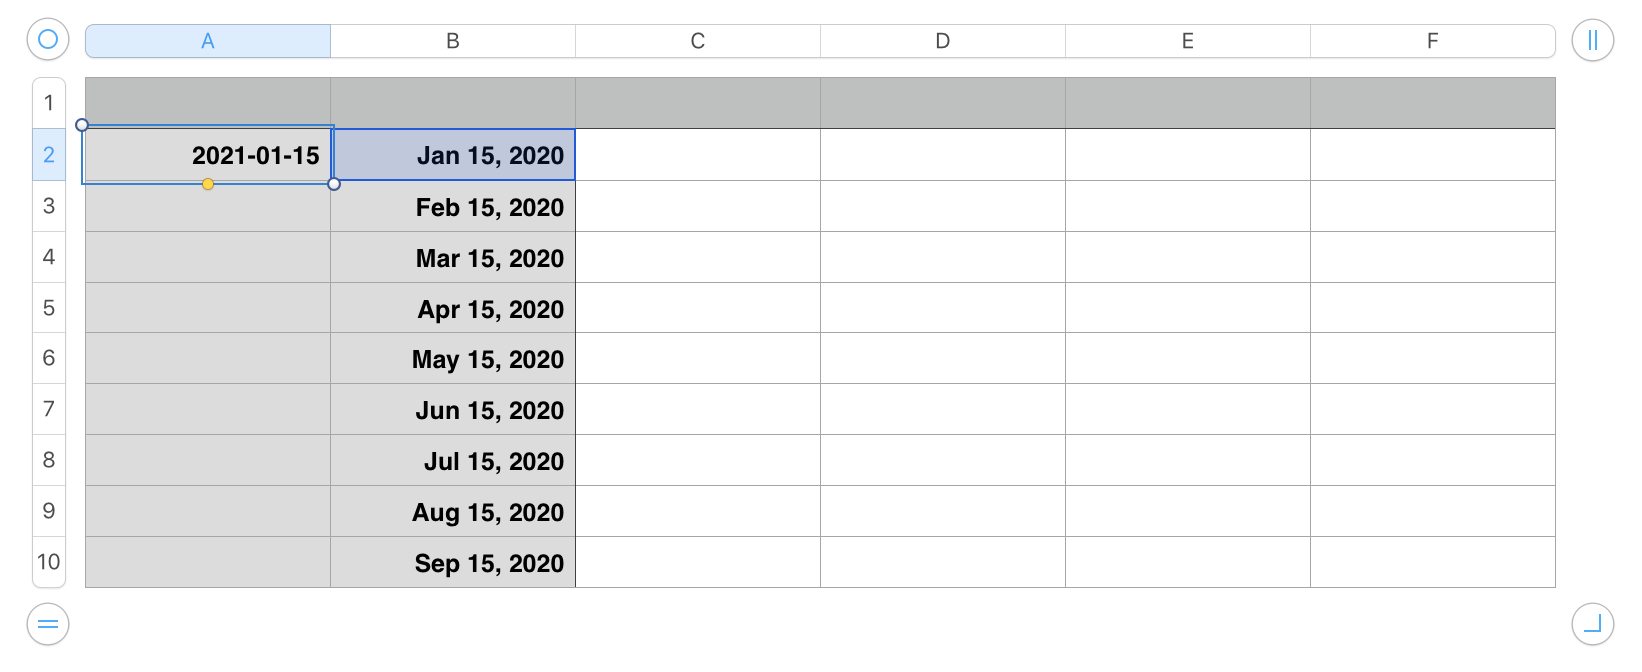

With the new date showing in A2 and that cell still selected:


Move the pointer close to the bottom of cell A2.

When the small yellow dt appears (see above), use the mouse pointer to grab it and drag it down the column to the last cell, filling copies of the formula into each cell in the column.
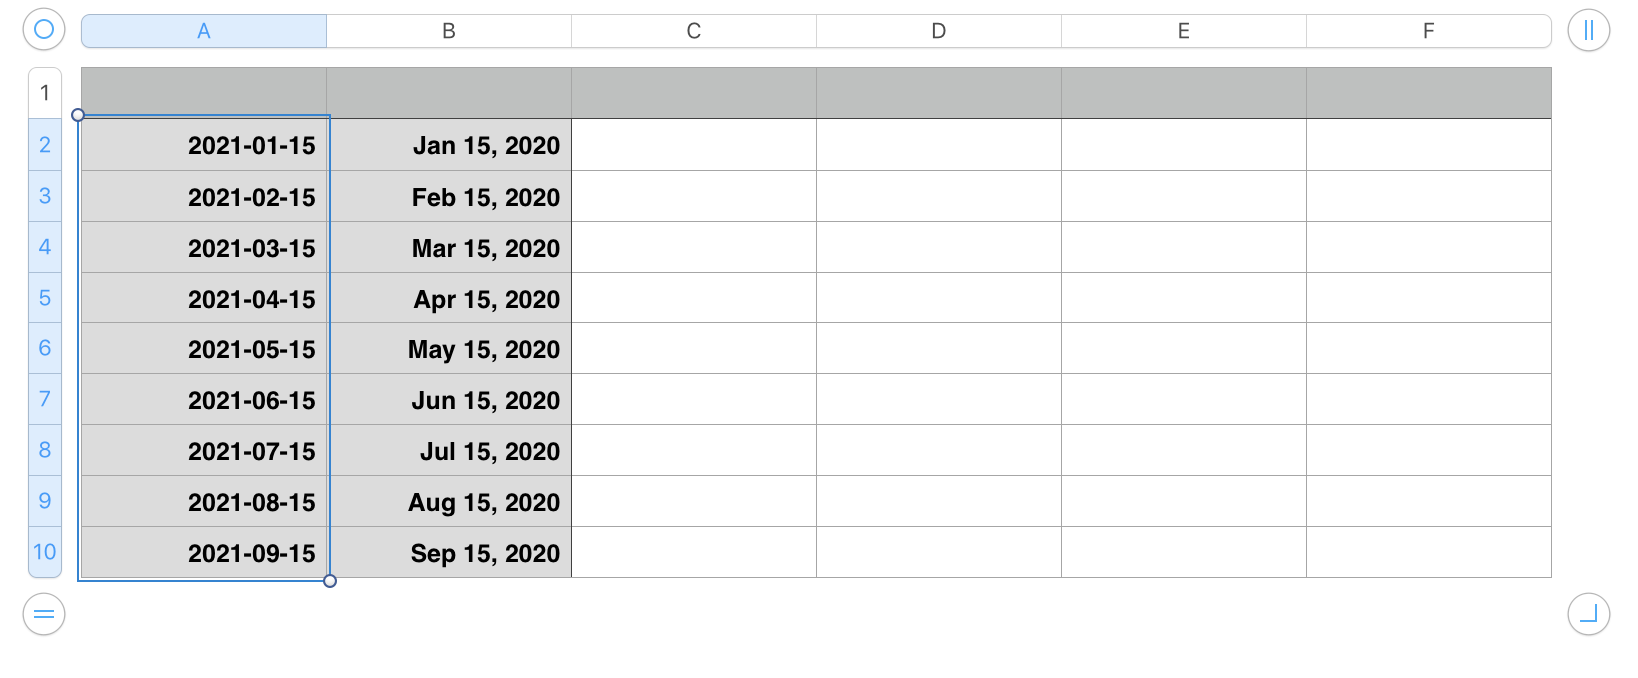

With all cells (except A1) of column A now selected, press command-C to Copy.


Then (with those cells still selected) go the the Edit menu and choose Paste Formula Results.

This replaces the formulas with the dates that have been calculated by those formulas.


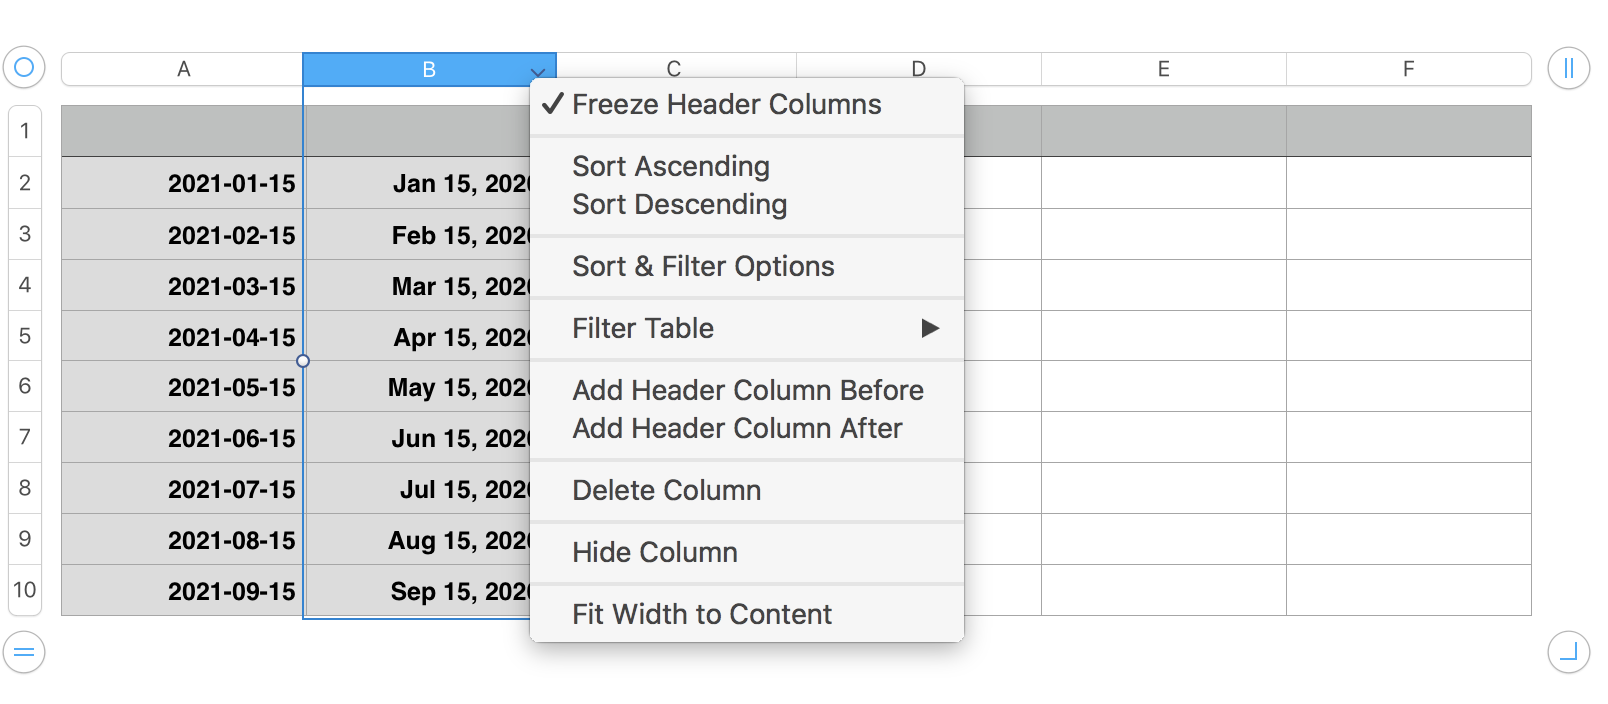
With the now-fixed dates set in the new column A, it is safe to delete column B (containing the previous years dates)

Hover the pointer over the rightward end of the reference tab for column B, click the v that appears to open a menu and choose Delete column.

Done.


Regards,

Barry

5 replies
Question marked as Top-ranking reply

May 17, 2021 6:36 PM in response to dpurper

Click on any cell of the 'old' table to activate it, then click on the circle that appears in the intersection of the row and column reference tabs to select the whole table. Press command-C to copy that table and its data and formulas to the clipboard,


Move to the new sheet that is to contain the new table (This may be a separate sheet in the same document or in a different document,). Delete the existing table that came with his sheet, then click on the sheet and press command-V to paste the old table on this sheet.


Keep the dates and any data that will remain the same on the new table, and remove any that will not be the same for this round.


For a table with no repeat data, the result should resemble this:


Click on any cell in column A, then press option-left arrow to add a new column to the left of column A.


In the new column A, select cell A2 (one click), then type = to open the formula editor.


Enter or paste the formula below into the editor, then click the green checkmark to confirm the formula and close the editor.


EDATE(B2,12)


With the new date showing in A2 and that cell still selected:


Move the pointer close to the bottom of cell A2.

When the small yellow dt appears (see above), use the mouse pointer to grab it and drag it down the column to the last cell, filling copies of the formula into each cell in the column.


With all cells (except A1) of column A now selected, press command-C to Copy.


Then (with those cells still selected) go the the Edit menu and choose Paste Formula Results.

This replaces the formulas with the dates that have been calculated by those formulas.


With the now-fixed dates set in the new column A, it is safe to delete column B (containing the previous years dates)

Hover the pointer over the rightward end of the reference tab for column B, click the v that appears to open a menu and choose Delete column.


Done.


Regards,

Barry

May 17, 2021 9:17 PM in response to dpurper

dpurper wrote:


So 5/2/2021 becomes 6/2/2021 and 5/4/2021 becomes 6/4/2021, etc.

Is there a quick way to grab a set of dates and, basically, tell them each to "add one month"?


This is easily done with a short script. No knowledge of AppleScript needed. Just select cells with dates for which you want to increment the month, and click 'run.'


tell front document of application "Numbers"
	tell active sheet
		tell (first table whose class of selection range is range)
			repeat with c in cells of (get selection range)
				set v to value of c
				set m to month of v as number
				set month of v to m + 1
				set value of c to v
			end repeat
		end tell
	end tell
end tell


Copy-paste script into Script Editor (in Applications > Utilities. Select the cells and click the 'run' button.


If "nothing happens" check to make sure Script Editor is listed and selected at System Preferences > Security & Privacy > Privacy > Accessibility.


Test on a duplicate table first to make sure it is doing what you want.


If you need to use it often then for easy access you can put it in the Script Menu, where it acts like any other menu pick.


SG


SG


Adjust a range of dates by a set amount

Welcome to Apple Support Community
A forum where Apple customers help each other with their products. Get started with your Apple Account.