Looks like no one’s replied in a while. To start the conversation again, simply ask a new question.

HDR PQ workflow for Canon cameras (Sequoia 15.1)

Here's a workflow that seems to work well for my Canon EOS R5 (Mark I):


  1. Capture a full 45 megapixel image in HDR PQ
  2. Transfer to macOS Sequoia (15.1) using Canon's EOS Utility 3 (V3.18.41)
  3. If desired, use Canon's DPP (V4.19.31.0) to reduce the resolution to approximately 20 megapixels (66% scaling) and save as HIF (DPP doesn't recognize images processed by non-Canon apps).
  4. Change the image extension from .HIF to .HEIC by renaming in Finder
  5. Import into the macOS Photos app (10.0) for editing
  6. Export the edited image from Photos as HEIC using the Original Color Profile option
  7. Open the exported image in Preview (11.0) and use Adjust Color in the Tools menu to increase the exposure slider by about 40%. This is to workaround the Photos export being too dark for images with the HDR PQ colour profile (I expect than this isn't an issue for HDR HLG used by iOS).


If required, the resulting HEIC image can be easily converted to JPEG (e.g. using right click in Finder followed by Quick Action>Convert Image). In my opinion, the resulting image has better detail (i.e. closer to the HDR image) than shooting directly in JPEG.


The More Info pop-up in Preview should indicate a headroom (ratio of HDR to SDR brightness) of about 10 as shown below.


As reminder, HDR PQ images are best viewed on a HDR monitor with at least 400 Nits of brightness. Check the System Settings>Displays to ensure that the High Dynamic Range slider is enabled and that a colour profile appropriate to the monitor is specified. Also, for the best HDR experience, make sure that the Brightness slider is not set higher than absolutely necessity (to give at least 2 stops of headroom above SDR white).


Here's a scaled screenshot of a recent photo processed using the above workflow (including a reduced resolution of about 20 megapixels):


- Pie Lover

Mac mini (M2, 2023)

Posted on Nov 21, 2024 6:57 AM

Reply
14 replies

Nov 29, 2024 6:52 AM in response to Matti Haveri

Hi Matti,


I had to scratch my head a bit :-) ...


Go to FYI: Generate custom Finder icon for RAW … - Apple Community and open on the third link from the top. The archive will contain a file named CB7A7103.HIF (10-bit HDR PQ) which is an unedited scaled version of the original EOS R5 image (converted using DPP with the shooting information removed).


Please let me know if you are able to complete the workflow(s) with your environment (requires Sequoia).


- Pie Lover


Dec 2, 2024 2:34 PM in response to BlueberryLover


Adobe's Gain Map Demo App (macOS) is a useful tool for adjusting the brightness on an HDR display (see screenshot below). Make sure to enable the Info Overlay from the Options menu.


For the example, the brightness setting below corresponds to a headroom of 2.5 (1.3 stops). For this monitor, lowering the brightness further can achieve a full 2 stops of headroom.


- Pie Lover


Nov 25, 2024 5:38 AM in response to BlueberryLover

Editing with Photos requires a good understanding of the app's adjustment tools. I wanted to pass along my initial experience with editing an HDR image:


  • The Histogram is helpful for visualization of the impacts of any changes (enable via the view menu)
  • The Light tool slider is a useful for increasing the subjective lighting of the scene. Click on its Options pulldown to see its effects and to fine-tune.
  • The Levels tool can be used to adjust the impact of HDR via tone mapping
  • The Selective Color tool is useful for adjusting specific colours. You can also experiment with the Range slider:
    • Range: Adjusts the range of colors that change based on your color selection. By changing the range, you can increase or decrease how much similar colors are affected in the image. For example, by increasing the range of a selected blue, you might change all the blues shown in a sky, or by decreasing the range, limit the change to a specific blue object.


Hope this helps.


- Pie Lover


Nov 28, 2024 1:48 PM in response to BlueberryLover

Once you've exported your HEIC HDR PQ file from Photos (as above), the next step might be to convert the file to a more compatible HDR format. macOS Sequoia and iOS 18 support ISO HDR and Adaptive HDR formats. You can convert HDR PQ to either of these formats using the following workflow:


  1. Open a new presentation in macOS Keynote using a basic black temple (you may have to delete any titles)
  2. Click on Document and select the Custom Slide Size option and enter the size of your image as the slide dimensions
  3. Drag & drop your image on the slide
  4. Go to File>Export to>Images
    1. Select HEIC from the Format pull-down
    2. Select either "Adaptive HDR" or "ISO HDR" from the Color Space pull-down
  5. Click on Save and enter the location and name of the folder to receive the image
  6. Move the image to the desired destination and rename if desired


See screenshots below (from Preview) of the original and converted images. Note that both the original 10-bit and PQ transfer curve are preserved by this method. Both the Adaptive HDR and ISO HDR retain the HDR effect when displayed on an iPhone (in my case, an iPhone XS Max running iOS 18.1.1).


- Pie Lover


HDR PQ


ISO HDR


Adaptive HDR

Nov 30, 2024 6:54 AM in response to BlueberryLover

There is a fairly simple method to automate the conversion process to Adaptive HDR or ISO HDR using the Keynote export feature. This method assumes that a single image size is used for the export (the images will be scaled to fit the specified size). Here is the modified workflow (requires AppleScript below):


  1. Open a new presentation in macOS Keynote using a basic black temple (delete any titles)
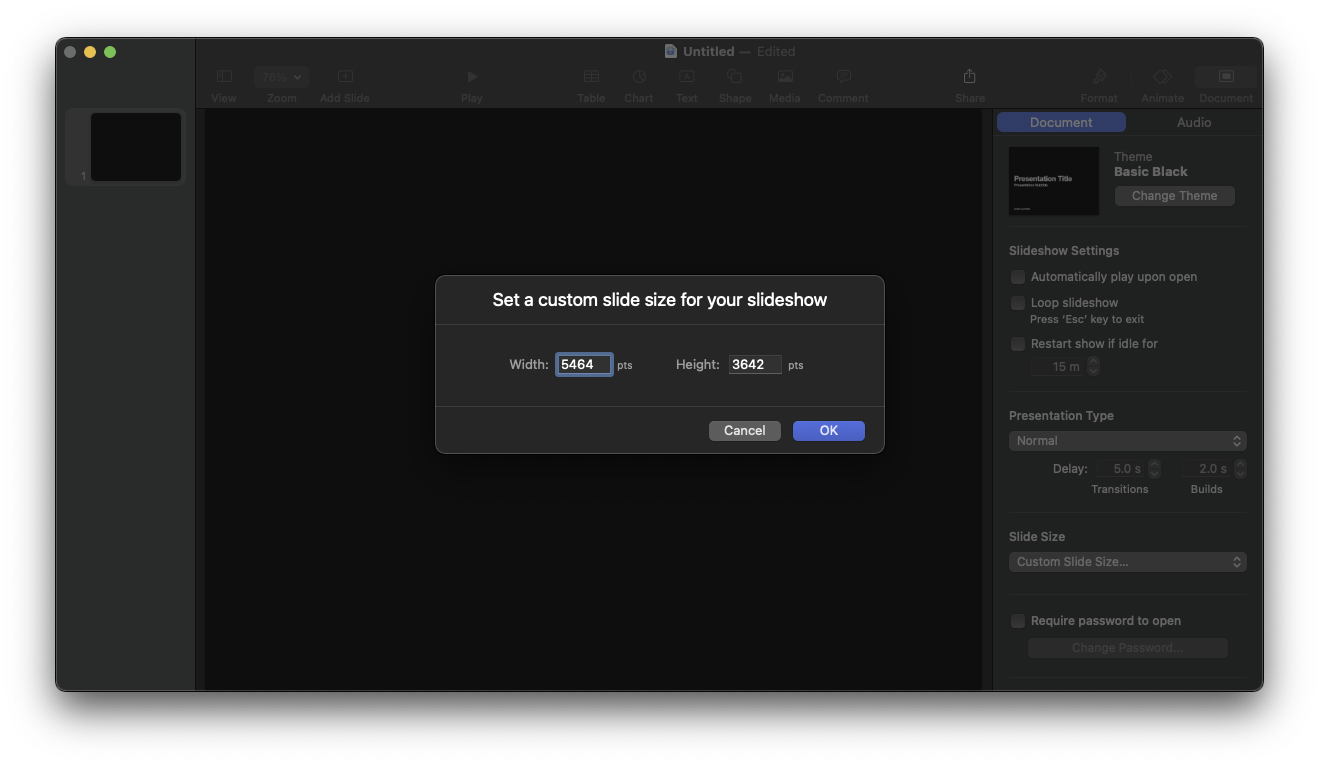
  2. Click on Document and select the Custom Slide Size option and enter the desired image size as the slide dimensions

3. Open the Script Editor app, copy the script below, and run the script

4. In Finder, select the images that you wish to convert

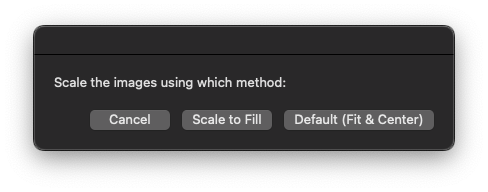
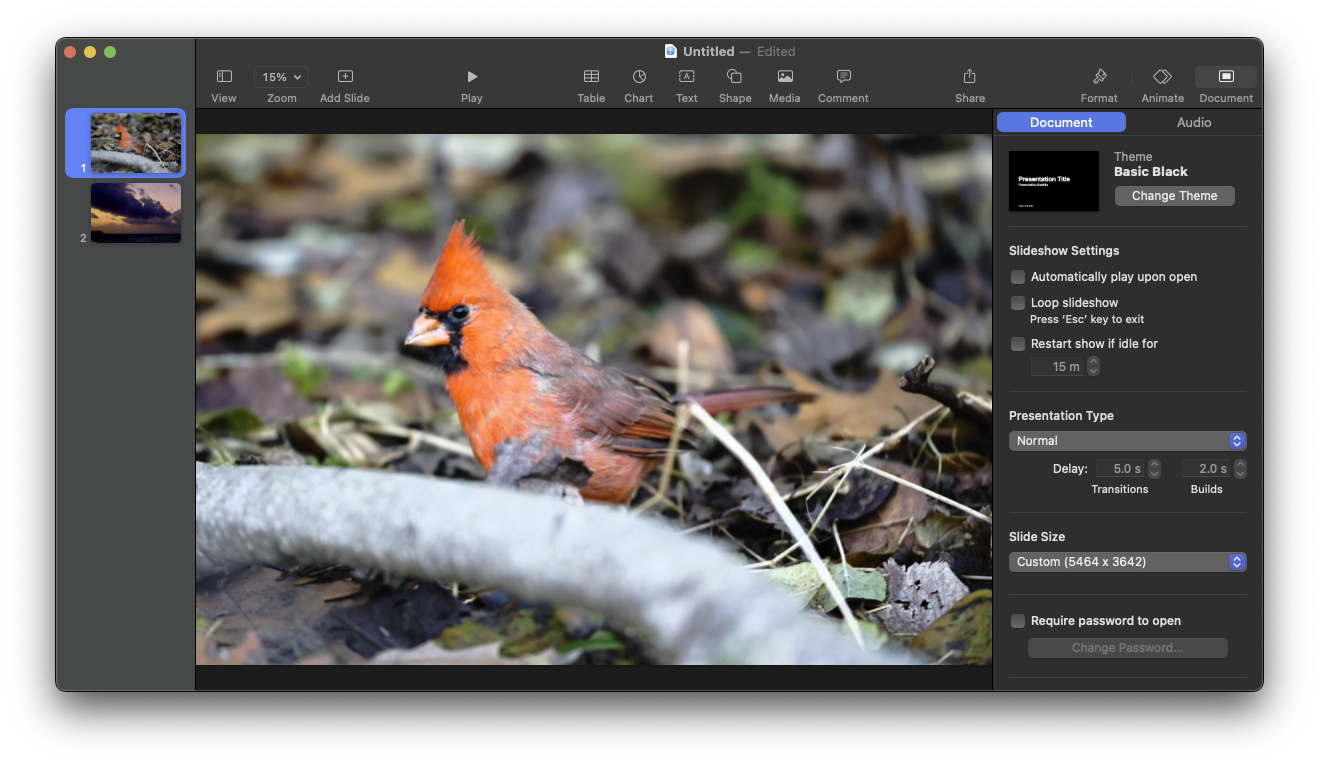
5. Click on the Scale to Fill button. The script will place each selected image (scaled appropriately) on a separate slide.

6. Go to File>Export to>Images in Keynote

1. Select HEIC from the Format pull-down

2. Select either "Adaptive HDR" or "ISO HDR" from the Color Space pull-down

7. Click on Save and enter the location and name of the folder to receive the automatically numbered images

8. Move the images to the desired destination and rename if desired


Note that, using this script, it is quite straightforward to create an Automator app or Quick Action:

- Pie Lover


AppleScript to create Keynote individual slides each with a single image

(taken verbatim from the iWork Automation site)


tell application "Keynote"
	activate
	if playing is true then tell the front document to stop
	
	set theseImageFiles to ¬
		(choose file of type "public.image" with prompt ¬
			"Select the image file(s) to import:" default location ¬
			(path to pictures folder) with multiple selections allowed)
	
	display dialog "Scale the images using which method:" buttons ¬
		{"Cancel", "Scale to Fill", "Default (Fit & Center)"} default button 3
	if the button returned of the result is "Scale to Fill" then
		set scaleToFill to true
	else
		set scaleToFill to false
	end if
	
	repeat with i from 1 to the count of theseImageFiles
		set thisImageFile to item i of theseImageFiles
		if not (exists document 1) then
			set thisDocument to make new document
			set thisSlide to the first slide of thisDocument
			set the base layout of thisSlide to slide layout "Blank" of thisDocument
		else
			tell front document
				set thisSlide to make new slide with properties ¬
					{base layout:slide layout "Blank"}
			end tell
		end if
		my addImageFileToSlide(thisSlide, thisImageFile, scaleToFill)
	end repeat
	
end tell

on addImageFileToSlide(thisSlide, thisImageFile, scaleToFill)
	tell application "Keynote"
		try
			activate
			set queryResult to my getImageDimensions(POSIX path of thisImageFile)
			if queryResult is false then
				error number 10000
			else
				copy queryResult to {imageWidth, imageHeight}
			end if
			tell front document
				set documentWidth to its width
				set documentHeight to its height
			end tell
			tell thisSlide
				if scaleToFill is false then
					set thisImage to make new image with properties {file:thisImageFile}
					tell thisImage
						set thisImageWidth to its width
						set thisImageHeight to its height
						-- center image
						set position of it to ¬
							{(documentWidth - thisImageWidth) / 2 ¬
								, (documentHeight - thisImageHeight) / 2}
					end tell
				else -- scale to fill
					-- figure new image height based on setting new image width to slide width
					set newImageHeight to (imageHeight * documentWidth) / imageWidth
					-- check to see if new image height is greater than or equal to document height
					if newImageHeight is greater than or equal to documentHeight then
						set newImageWidth to documentWidth
						-- center image vertically
						set verticalOffset to ((newImageHeight - documentHeight) / 2) * -1
						set horizontalOffset to 0
					else
						-- scale image height to match slide height
						set newImageHeight to documentHeight
						set newImageWidth to (documentHeight * imageWidth) / imageHeight
						-- center image horizontally
						set verticalOffset to 0
						set horizontalOffset to ((newImageWidth - documentWidth) / 2) * -1
					end if
					-- import, scale, and position image
					set thisImage to make new image with properties ¬
						{file:thisImageFile ¬
							, width:newImageWidth ¬
							, height:newImageHeight ¬
							, position:{horizontalOffset, verticalOffset}}
				end if
			end tell
		on error errorMessage number errorNumber
			if errorNumber is not -128 then
				display alert errorNumber message errorMessage
			end if
			error number -128
		end try
	end tell
end addImageFileToSlide

on getImageDimensions(thisImageFilePOSIXPath)
	try
		set imageWidth to ¬
			(do shell script "mdls -raw -name kMDItemPixelWidth " & ¬
				quoted form of thisImageFilePOSIXPath) as integer
		set imageHeight to ¬
			(do shell script "mdls -raw -name kMDItemPixelHeight " & ¬
				quoted form of thisImageFilePOSIXPath) as integer
		return {imageWidth, imageHeight}
	on error
		return false
	end try
end getImageDimensions

Nov 23, 2024 12:23 PM in response to BlueberryLover

I found it hard to confirm that HDR PQ images were being displayed correctly in macOS Sequoia especially in Preview. Fortunately, the Canon EOS R5 (Mark I) can display an HDR image over HDMI directly on an HDR enabled monitor. To enable this go to View menu 5 and set "HDMI HDR output" to "On". Once you connect the camera (via an HDMI micro to full-sized cable) to the monitor, display the image by controlling the camera in the usual way.


As an added test, you can toggle HDMI HDR output to Off to assess the same image in SDR. By keeping this comparison in mind, you can confirm that the macOS and monitor are correctly displaying HDR PQ images. As mentioned previously, if viewing in Preview, don't forget to boost the exposure for the HDR PQ image for proper display.


Below is a photo of the monitor screen (taken with an iPhone in HDR mode) with the R5 correctly directly to the monitor via HDMI. Unfortunately, this method of capture can't do justice to the quality of the displayed image.


- Pie Lover


Nov 29, 2024 6:05 PM in response to BlueberryLover

I open 3 HDR versions of an HEIF image using Safari. The HDR PQ and ISO HDR look identical. The Adaptive HDR may be a tiny bit brighter on my HDR display.


BTW, the rendering of the HDR PQ and ISO HDR images in Safari is quite slow on a Mac mini M2.


- Pie Lover


(PNG screenshot) Comparison of Adaptive HDR, ISO HDR, and HDR PQ images displayed with Safari

Dec 1, 2024 4:52 AM in response to BlueberryLover

Keynote can also create simple slideshows using its built-in HDR movie export feature. A music track can be added using QuickTime.


Below is the Movie Inspector window from QuickTime of an HDR test video made by this technique. Bright whites really "pop" on an iPhone XS Max (1.7 stops brighter than SDR white (660 Nits)) and on an HDR monitor.


A 27 second, 9 image slideshow required only 6.4MB of storage due to the efficient HEVC encoding.


- Pie Lover


Dec 8, 2024 11:58 AM in response to BlueberryLover

Automator actions to insert HEIC HDR images into a Keynote presentation to be exported either as Adaptive HDR or ISO HDR.


Notes:


1 . Prior to running, user should define an empty "My Themes" theme named "Blank"


2. Slides have a predefined fixed size (currently set to 5464 x 3642)

3. Any portait images should be rotated to landscape and then back to portrait after executing

4. Use Keynote FIle>Export>Images to save Adaptive HDR or ISO HDR image(s)


If an Automator app is created then you can use drag & drop to select the folder containing the image(s)


Action #1: select HEIC image(s)

on run {input, parameters}
	
	if input is {} then -- nothing dropped
		return (choose folder with prompt "Select the image folder" default location alias (path to pictures folder))
	else
		
		if (count of items in input) = 1 then
			tell application "System Events"
				set theFolder to path of (item 1 of input)
			end tell
		else
			error "Can only process a single folder"
		end if
		
		return alias (theFolder)
		
	end if
	
end run


Action #2: add selected image(s) to a new Keynote presentation

on run {input, parameters}
	
	set theFolder to POSIX path of item 1 of input as text
	
	tell application "Keynote"
		activate
		if playing is true then tell the front document to stop
		
		set theseImageFiles to ¬
			(choose file of type "public.heic" with prompt ¬
				"Select the HEIC image file(s) to import:" default location ¬
				theFolder with multiple selections allowed)
		
		display dialog "Scale the images using which method:" buttons ¬
			{"Cancel", "Scale to Fill", "Default (Fit & Center)"} default button 3
		if the button returned of the result is "Scale to Fill" then
			set scaleToFill to true
		else
			set scaleToFill to false
		end if
		
		repeat with i from 1 to the count of theseImageFiles
			set thisImageFile to item i of theseImageFiles
			if not (exists document 1) then
				set thisDocument to make new document with properties ¬
					{document theme:theme "Blank", width:5464, height:3642}
				set thisSlide to the first slide of thisDocument
				set the base layout of thisSlide to slide layout "Blank" of thisDocument
			else
				tell front document
					set thisSlide to make new slide with properties ¬
						{base layout:slide layout "Blank"}
				end tell
			end if
			my addImageFileToSlide(thisSlide, thisImageFile, scaleToFill)
		end repeat
		
	end tell
	
end run

on addImageFileToSlide(thisSlide, thisImageFile, scaleToFill)
	tell application "Keynote"
		try
			activate
			set queryResult to my getImageDimensions(POSIX path of thisImageFile)
			if queryResult is false then
				error number 10000
			else
				copy queryResult to {imageWidth, imageHeight}
			end if
			tell front document
				set documentWidth to its width
				set documentHeight to its height
			end tell
			tell thisSlide
				if scaleToFill is false then
					set thisImage to make new image with properties {file:thisImageFile}
					tell thisImage
						set thisImageWidth to its width
						set thisImageHeight to its height
						-- center image
						set position of it to ¬
							{(documentWidth - thisImageWidth) / 2 ¬
								, (documentHeight - thisImageHeight) / 2}
					end tell
				else -- scale to fill
					-- figure new image height based on setting new image width to slide width
					set newImageHeight to (imageHeight * documentWidth) / imageWidth
					-- check to see if new image height is greater than or equal to document height
					if newImageHeight is greater than or equal to documentHeight then
						set newImageWidth to documentWidth
						-- center image vertically
						set verticalOffset to ((newImageHeight - documentHeight) / 2) * -1
						set horizontalOffset to 0
					else
						-- scale image height to match slide height
						set newImageHeight to documentHeight
						set newImageWidth to (documentHeight * imageWidth) / imageHeight
						-- center image horizontally
						set verticalOffset to 0
						set horizontalOffset to ((newImageWidth - documentWidth) / 2) * -1
					end if
					-- import, scale, and position image
					set thisImage to make new image with properties ¬
						{file:thisImageFile ¬
							, width:newImageWidth ¬
							, height:newImageHeight ¬
							, position:{horizontalOffset, verticalOffset}}
				end if
			end tell
		on error errorMessage number errorNumber
			if errorNumber is not -128 then
				display alert errorNumber message errorMessage
			end if
			error number -128
		end try
	end tell
end addImageFileToSlide

on getImageDimensions(thisImageFilePOSIXPath)
	try
		set imageWidth to ¬
			(do shell script "mdls -raw -name kMDItemPixelWidth " & ¬
				quoted form of thisImageFilePOSIXPath) as integer
		set imageHeight to ¬
			(do shell script "mdls -raw -name kMDItemPixelHeight " & ¬
				quoted form of thisImageFilePOSIXPath) as integer
		return {imageWidth, imageHeight}
	on error
		return false
	end try
end getImageDimensions

Nov 28, 2024 5:54 PM in response to BlueberryLover

I tested HDR PQ conversion using Keynote with a full 45 megapixel image (8192x5464). The workflow successfully converted both ISO HDR and Adaptive HDR options at this maximum EOS R5 (Mark I) resolution.


I wonder whether it would be possible (and how difficult) to automate the conversion process using Automator. On the other hand, multiple images of the identical size can be converted in a batch (i.e. using multiple slides in a single presentation).


- Pie Lover


Dec 9, 2024 3:30 AM in response to BlueberryLover

Another consideration is that conversion using Keynote removes all the EXIF data associated with the original HEIC file. If the original EXIF data needs to be retained, it can quickly be copied using Phil Harvey's exiftool. As an example, use the following command line from Terminal:


exiftool -TagsFromFile OriginalFileName.heic ConvertedFileName.heic


- Pie Lover

HDR PQ workflow for Canon cameras (Sequoia 15.1)

Welcome to Apple Support Community
A forum where Apple customers help each other with their products. Get started with your Apple Account.