There is a fairly simple method to automate the conversion process to Adaptive HDR or ISO HDR using the Keynote export feature. This method assumes that a single image size is used for the export (the images will be scaled to fit the specified size). Here is the modified workflow (requires AppleScript below):
- Open a new presentation in macOS Keynote using a basic black temple (delete any titles)
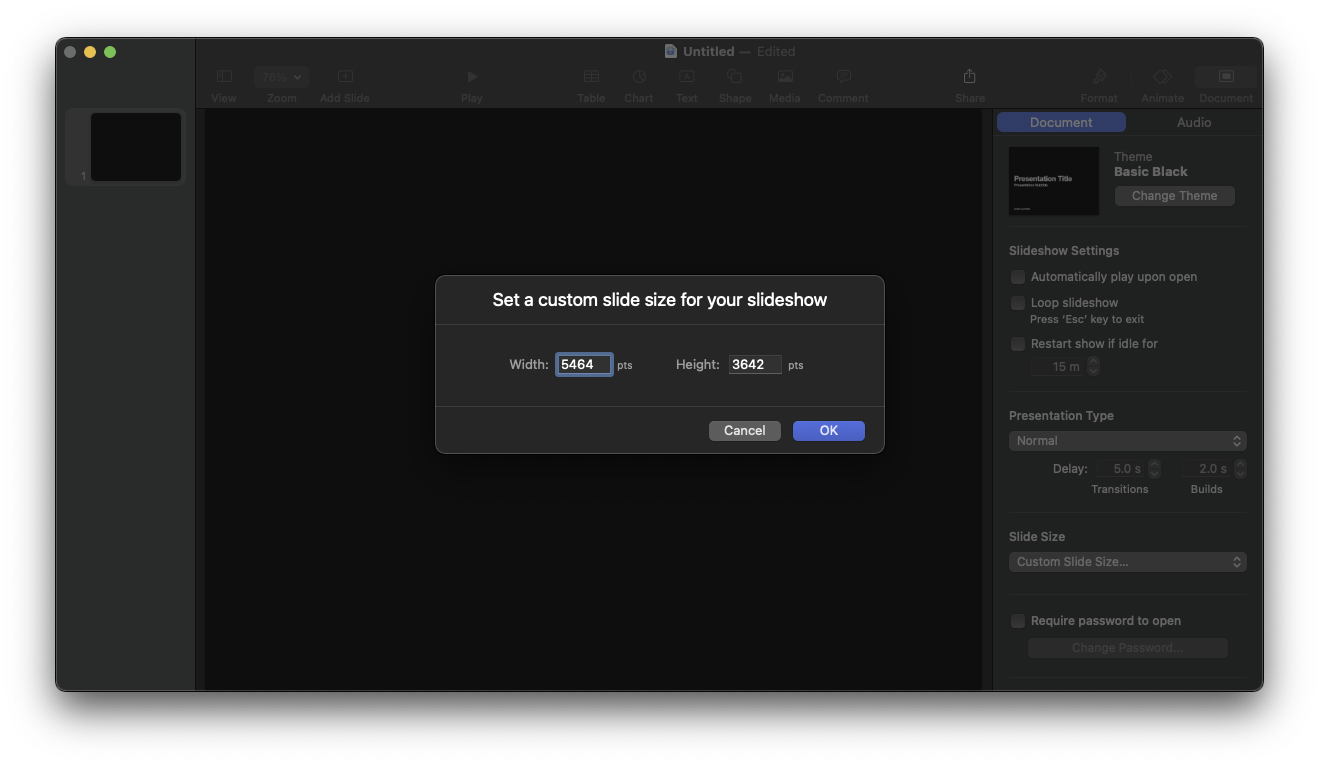
- Click on Document and select the Custom Slide Size option and enter the desired image size as the slide dimensions

3. Open the Script Editor app, copy the script below, and run the script
4. In Finder, select the images that you wish to convert
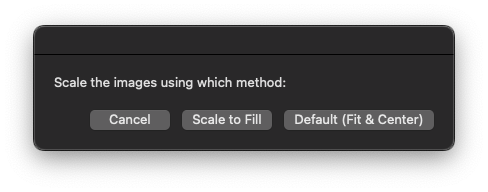
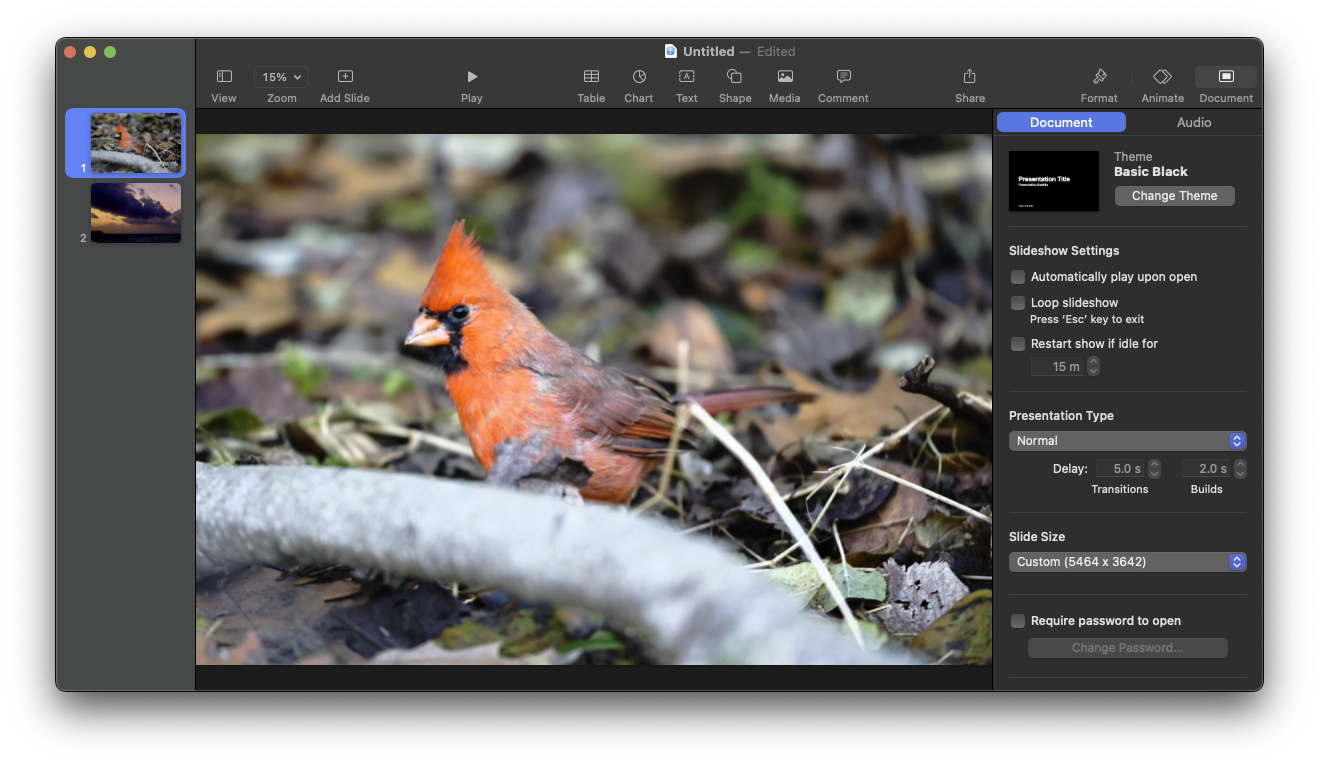
5. Click on the Scale to Fill button. The script will place each selected image (scaled appropriately) on a separate slide.


6. Go to File>Export to>Images in Keynote
1. Select HEIC from the Format pull-down
2. Select either "Adaptive HDR" or "ISO HDR" from the Color Space pull-down
7. Click on Save and enter the location and name of the folder to receive the automatically numbered images
8. Move the images to the desired destination and rename if desired
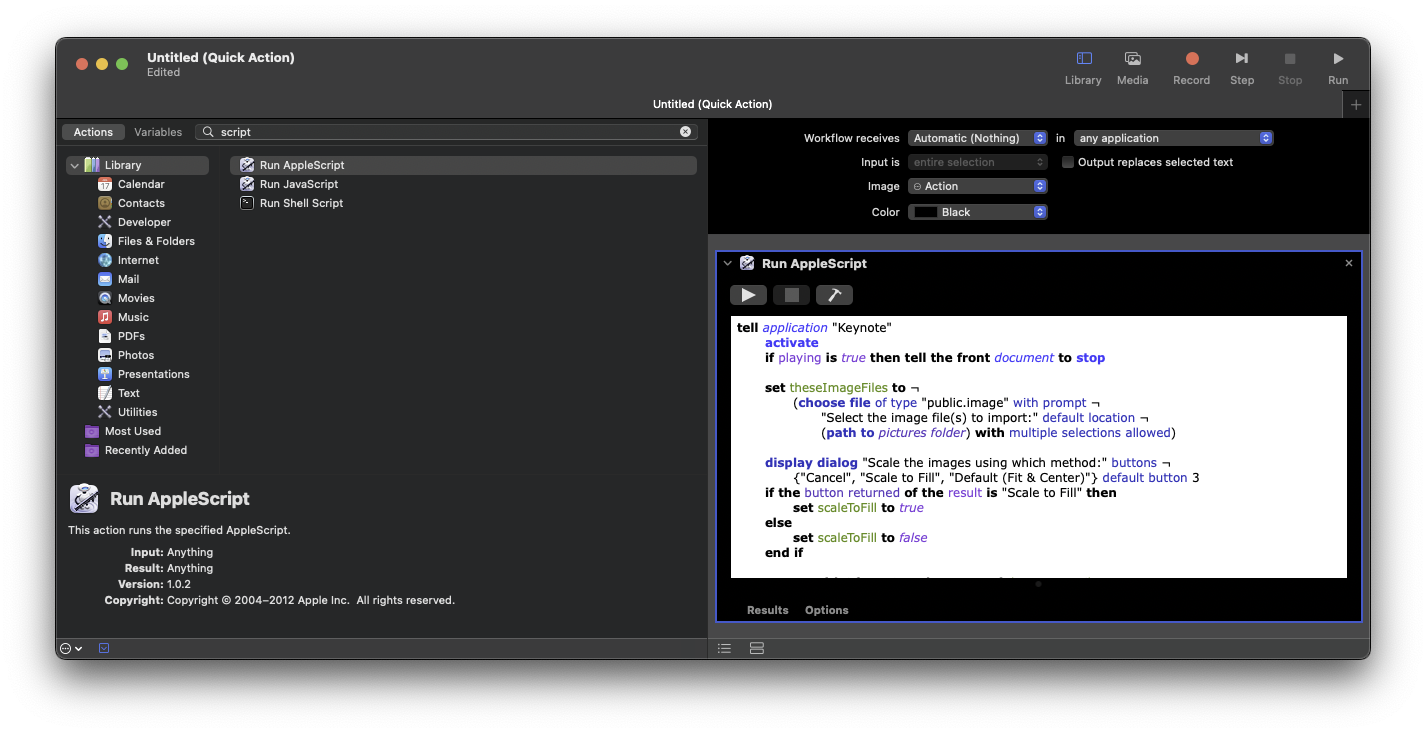
Note that, using this script, it is quite straightforward to create an Automator app or Quick Action:

- Pie Lover
AppleScript to create Keynote individual slides each with a single image
(taken verbatim from the iWork Automation site)
tell application "Keynote"
	activate
	if playing is true then tell the front document to stop

	set theseImageFiles to ¬
		(choose file of type "public.image" with prompt ¬
			"Select the image file(s) to import:" default location ¬
			(path to pictures folder) with multiple selections allowed)

	display dialog "Scale the images using which method:" buttons ¬
		{"Cancel", "Scale to Fill", "Default (Fit & Center)"} default button 3
	if the button returned of the result is "Scale to Fill" then
		set scaleToFill to true
	else
		set scaleToFill to false
	end if

	repeat with i from 1 to the count of theseImageFiles
		set thisImageFile to item i of theseImageFiles
		if not (exists document 1) then
			set thisDocument to make new document
			set thisSlide to the first slide of thisDocument
			set the base layout of thisSlide to slide layout "Blank" of thisDocument
		else
			tell front document
				set thisSlide to make new slide with properties ¬
					{base layout:slide layout "Blank"}
			end tell
		end if
		my addImageFileToSlide(thisSlide, thisImageFile, scaleToFill)
	end repeat

end tell

on addImageFileToSlide(thisSlide, thisImageFile, scaleToFill)
	tell application "Keynote"
		try
			activate
			set queryResult to my getImageDimensions(POSIX path of thisImageFile)
			if queryResult is false then
				error number 10000
			else
				copy queryResult to {imageWidth, imageHeight}
			end if
			tell front document
				set documentWidth to its width
				set documentHeight to its height
			end tell
			tell thisSlide
				if scaleToFill is false then
					set thisImage to make new image with properties {file:thisImageFile}
					tell thisImage
						set thisImageWidth to its width
						set thisImageHeight to its height
						-- center image
						set position of it to ¬
							{(documentWidth - thisImageWidth) / 2 ¬
								, (documentHeight - thisImageHeight) / 2}
					end tell
				else -- scale to fill
					-- figure new image height based on setting new image width to slide width
					set newImageHeight to (imageHeight * documentWidth) / imageWidth
					-- check to see if new image height is greater than or equal to document height
					if newImageHeight is greater than or equal to documentHeight then
						set newImageWidth to documentWidth
						-- center image vertically
						set verticalOffset to ((newImageHeight - documentHeight) / 2) * -1
						set horizontalOffset to 0
					else
						-- scale image height to match slide height
						set newImageHeight to documentHeight
						set newImageWidth to (documentHeight * imageWidth) / imageHeight
						-- center image horizontally
						set verticalOffset to 0
						set horizontalOffset to ((newImageWidth - documentWidth) / 2) * -1
					end if
					-- import, scale, and position image
					set thisImage to make new image with properties ¬
						{file:thisImageFile ¬
							, width:newImageWidth ¬
							, height:newImageHeight ¬
							, position:{horizontalOffset, verticalOffset}}
				end if
			end tell
		on error errorMessage number errorNumber
			if errorNumber is not -128 then
				display alert errorNumber message errorMessage
			end if
			error number -128
		end try
	end tell
end addImageFileToSlide

on getImageDimensions(thisImageFilePOSIXPath)
	try
		set imageWidth to ¬
			(do shell script "mdls -raw -name kMDItemPixelWidth " & ¬
				quoted form of thisImageFilePOSIXPath) as integer
		set imageHeight to ¬
			(do shell script "mdls -raw -name kMDItemPixelHeight " & ¬
				quoted form of thisImageFilePOSIXPath) as integer
		return {imageWidth, imageHeight}
	on error
		return false
	end try
end getImageDimensions